Grade 6 students practicing in partners how to identify the multiples of a given number using tabletop whiteboards.
A space to connect and share with other Learning Commons in and around the Calgary Area!
Showing posts with label Keeler. Show all posts
Friday, 27 February 2015
Thursday, 26 February 2015
#YYCLC Day 110: Kindergarten Collaboration
Keeler kindergarten students using stacking cups to accentuate the circles in our Learning Commons carpet.
Labels:
#182LC,
Amber Mazur,
Keeler,
keeler learning commons,
kindergarten
Wednesday, 25 February 2015
#YYCLC Day 109: Lego Mindstorms and Collaboration
Students in grades 4 and 5 work collaboratively to choose a design and begin to build a Lego Mindstorm in the Keeler School Maker Club.
Labels:
#182LC,
#cbemaker,
21centurylearning,
Amber Mazur,
Grade 4,
grade 5,
Keeler,
keeler learning commons,
Lego
Tuesday, 24 February 2015
#YYCLC Day 108: Digital Literacy in Grade 2
Grade 2 students at Keeler School learning how to identify the different components of a web page, including the web address, banner, title, navigation bar and content.
Labels:
#182LC,
21centurylearning,
Amber Mazur,
Digital Citizenship,
Digital Literacy,
Grade 2,
Keeler,
keeler learning commons
Monday, 23 February 2015
Friday, 28 November 2014
#YYCLC Day 61: Sketchbook Pro at Keeler School
Grade 5 students at Keeler School using Sketchbook Pro in iPads with stylus pens to sketch photos of themselves. These will be sent to their class pen pals.
Labels:
#182LC,
21centurylearning,
Amber Mazur,
App,
apps for learning,
Authenic,
Edtech,
grade 5,
Keeler,
Learning Commons
Thursday, 27 November 2014
#YYCLC Day 60: Kidblog and Grade 6 Math
Students at Keeler School being introduced to Kidblog as a way to demonstrate understanding of math concepts.
Labels:
#182LC,
21centurylearning,
Amber Mazur,
Grade 6,
Keeler,
Learning Commons,
Virtual Learning Space
Friday, 26 September 2014
#YYCLC Day 19 - Rainbow Looms
Labels:
#182LC,
#cbemaker,
#MakerEd,
21centurylearning,
Amber Mazur,
independent,
Keeler,
KeelerLC,
Maker Station
Tuesday, 23 September 2014
Friday, 19 September 2014
#YYCLC Day 14: Non-Fiction Scavenger Hunt
Students in grade 5 at Keeler School on a scavenger hunt for features commonly found in non-fiction text.
Labels:
#YYCLC182,
21centurylearning,
Amber Mazur,
Keeler,
KeelerLC,
resources
Saturday, 6 September 2014
MakerFaireYYC
http://www.makerfaireyyc.ca
I’m presenting today at the MakerFaireYYC in a panel of outstanding CBE teachers and other teachers - I’m more excited about what I can learn than what I have to share! Some questions they have prepared for us are:
- ntroduce yourself and tell us how you’ve brought Maker to your school?
I’m Mike MacKenzie, and I was in the LC at Keeler for a few years. The LC space is a formal library with a student focus that encourages and supports hands-on learning and collaboration. Learning Commons, though, seem to be in a constant state of evolution. As the LC model develops, it has begun to emerge as a place where things (teacher directed and student directed) are being made/practiced. We just facilitate this evolution.
2. Where/how did you connect maker to what you’re teaching?
I taught with students throughout all grades (K-6), often on projects in Social Studies, Science, or Math. Each group was “making things” (zombie shelters and other blueprints in math, parachutes, cars, and airplanes in science, etc.). My role in the LC was to make learning visible and attainable to all students - so maker stations were born. Why should only grade 6 students make parachutes? All kids should get a chance... And with that our maker stations were born. Recess and lunch hour meant kids from across the school could come and build the grade 6 project. And if they got stuck? Grade 6 students were the experts, so they connected with them!
3. What inspired you to want to try maker?
Visual learning... Shared learning... Accessible learning... Kids are entrepreneurial, imaginative, and engaged when they have an environment that is safe, available, and where they can feel free to make (or make mistakes). Kids learn from other kids. When we set up that environment, the learning didn’t stop when kids left the classroom.
4. What were your challenges?
Mess and noise. At the beginning we didn’t set up the expectations for cleaning up afterwards (and the storing of projects), and often it felt trashed. And because we didn’t set a number limit on the kids entering the LC, we had too many kids at lunch. We generally fixed these with time and giving clearer expectations.
5. How did you set up your space physically?
The Learning Commons at Keeler is a big open space with tables on castors that can morph into a thousand different combinations. Eye-Hooks were screwed into bookshelves for pulley stations (4 or 5 throughout), stations were set on top of book shelves and in tubs, and a RaspberryPi was connected to a tv (also on wheels) that was standing only for groups to program.
6. What do you see as the future of maker in Education?
The future of a “Maker” education is potentially enormous. Open challenges presented by students (or teachers), as teachers facilitate and encourage the growth of entrepreneurial spirit... Kids are trusted (and groomed) to be designers. Trust is shown by providing time, materials, and by allowing noise. Students will teach other kids, too. Not in a strictly, “Science Fair” way where only the end product is shown- they will come together throughout the process and celebrate the process and the end products. Assessment, too, will be on competencies and processes where even if an end product doesn’t work, the ideas and creativity will be considered with more weight.
Monday, 5 May 2014
Keeler School Maker Stations: Part 2
Kids in the 2nd, 4th, 5th and 6th grades have all carried out science experiments and designed things during their lunch hour... For no reason other than because they want to! It has been outstanding, bizarre and wonderful to watch kids use our maker stations. It turns out that any project can, and should, be turned into a maker station for our learning commons.
Station 1: Parachutes. Read here about our parachute maker station. Since that post, there have been about 20 parachutes made by kids in different grades, and supported by grade 6 students who fielded their questions.
Station 2: Pulleys. Kids are doing a series of progressive challenges for pulleys, during LC times. The engagement was outstanding... So we opened it up for lunch time exploration. As kids were exploring at lunch, the grade 4s tried things we hadn't yet asked them to: They made cross-library zip lines as well as double, and even triple, pulley systems.
Station 3: Raspberry Pi. Although we're not studying programming in a classroom, we got our hands on a Raspberry Pi computer (loaded with Scratch) and a TV donated to our school. The domino effect was hilarious... At the first recess there were 2 kids around the computer. At lunch there were 4. The next day there were 8. The day after that, there were more. Questions I recorded:
Station 1: Parachutes. Read here about our parachute maker station. Since that post, there have been about 20 parachutes made by kids in different grades, and supported by grade 6 students who fielded their questions.
![]() |
| Kids (grade 2 and 5) building parachutes at lunch |
Station 2: Pulleys. Kids are doing a series of progressive challenges for pulleys, during LC times. The engagement was outstanding... So we opened it up for lunch time exploration. As kids were exploring at lunch, the grade 4s tried things we hadn't yet asked them to: They made cross-library zip lines as well as double, and even triple, pulley systems.
![]() |
| If you look closely, you'll see a pulley system from one part of the LC to another. |
- How do you make him walk?
- How could we make a background? Can it move while he's walking?
- What if he jumped on that guy, what would happen? How could we make something happen?
- Who can teach us? Where can...Youtube!! (And the students ran off to another computer)
In the past couple weeks we have really explored how we can use the space, and I think we've found it: These maker stations seem to be next step in the evolution of our LC!
Thursday, 24 April 2014
Maker Stations in the Learning Commons
Build it and they will come... Or provide stuff and they will build it! Our Learning Commons evolved to include "Maker Spaces"... I didn't realize this was happening... We have a "Philosophers' Board", multiple "Lego Walls", gears, puppets, costumes and Raspberry Pis (among other tinkering things that are available at all times for student use). But the amazing discussion at this year's EdcampYYC helped me to find the solution for guided learning and maker spaces in our Learning Commons context.
Best of all, they all know it is a grade 6 project, so if they need help they know who to ask! I've warned the 6s that questions could be coming their way, and was greeted with enthusiasm as they now see themselves as experts (YAY!). Which was handy today when we had 5 grade 4 students eagerly making their own parachutes (during lunch), and seeking help. I overheard a grade 4 ask a grade 6, "Why is there a hole in the middle of your parachute? Did you make a mistake?" (Great question!!).
This has really got me thinking... Could this work with cars? Catapults? Clothing design? Looms? Pulleys? Could any design-based task work as a maker station?... I think we're starting to turn a corner in our LC, and I can feel the enthusiasm growing from our students!
Here are the directions for the station:
Wednesday, 18 September 2013
Exergaming - KWL - Reflection 1
Exergaming: Reflection 1
Sixteen grade 6 kids successfully collaborated on the same KWL document through Google Docs. A student’s insight is valuable, but when you can fuse small-group safety with large-group collaboration something magical happens... Everyone’s ideas are heard, recorded and compounded by peers.
The students formed 3 groups, each logged on to a computer and followed a link provided. They made teams, talked about exergaming, and let ideas flow. Students were told that there is no such thing as “cheating” during brainstorming, which elevated the discussion as individual’s ideas became seeds, furthered by peers in different groups.
Students were set as scribes to manage how many people were typing, but there were times when 2 or 3 kids from each group were typing at the same time. This was a very successful KWL experience. The finished document is below, a time-lapse video is on it's way- I'm being blocked from uploading it to Youtube, but check it out here: http://keelercommons.weebly.com/grade-6-exergaming.html
Labels:
Exergaming,
GAFE,
Google Docs,
Keeler,
KWL,
Mike MacKenzie
Tuesday, 11 June 2013
4 Ways to Activate Students With iMovie
Have you ever climbed a mountain and not looked back? Can you imagine, not taking pride in the distance you've come, or building anticipation as you look forward? iMovie on the iPad has been an enormously successful tool that encourages reflection and anticipation for learning.
I started thinking about the power of simple recordings when I had a disadvantaged student who rarely arrived on time... Morning work was SMART Board based, so I used quicktime to do a screen capture so he could work without missing a beat.
This line of thinking naturally led me to iMovie on the iPad.
Instant reflection.
We had grade 4 kids that were challenged to make a double pulley system. They got stuck a lot, and teachers "annoyingly" pelted students with questions, not answers. Soon students started thinking out loud... Talking, sharing and collaborating with their partners and other teams...Teachers gave power to the students and partnered with them... Then we started recording. iMovie edits on the fly, so we were able to share students' creative, problem-solving thoughts with the entire class immediately after the lesson. A question in one group became a discussion point for the class, and the everyone took turns either building on the wonderment or providing solutions and ideas.
Get your head in the game!
A different class was studying Air and Aerodynamics where they were challenged to land a flying machine while keeping a lego-minifigure safe... Each work-period, though, they were starting from scratch. Their minds slowly (too slowly) began to ease into the lesson, so we filmed them thinking/questioning/working and hooked them by reminding them of the great work they had done in the previous lesson. We've repeated this a few times and have always been blown away by how a 2-5 minute video can instantly reengage students in their learning.
Documentaries.
In a 40 minute lesson, kids can develop a documentary and can be introduced to a new topic. They can develop questions to guide the inquiry and can help fill up the "Know" bit of a KWL... with ease. We pulled out a bunch of books, threw them on the floor and passed out iPads. After a 3 minute tutorial on iMovie (optional!), we asked kids to craft a documentary about the topic that included audio, video, titles, and visuals. Students took pictures from the book and published a 2-minute documentary. Ideally we'd throw those up on the internet for students to watch from home, but we wound up showing them to the class. It was amazing how activated their memories were... When we started to look at our prior knowledge, they were exploding with (base level) ideas. More importantly though, they were primed for the deeper learning that followed!
Celebrations.
For our most recent unit on the Inuit Games we showcased our learning to the entire school by hosting every grade. The grade 2 student-leaders taught all of the kids how to play their games, and the students responded by doing their best, being respectful and playing hard (it was a pretty amazing morning!). As students were leading and learning we recorded the entire process. On the fly, we edited a 10-minute video that included each grade 2 student. We also made a trailer on iMovie. In the afternoon the grade 2s all got together and had their own celebration of learning where they could watch themselves directing older kids, sharing their knowledge, and being successful.
I started thinking about the power of simple recordings when I had a disadvantaged student who rarely arrived on time... Morning work was SMART Board based, so I used quicktime to do a screen capture so he could work without missing a beat.
This line of thinking naturally led me to iMovie on the iPad.
Instant reflection.
We had grade 4 kids that were challenged to make a double pulley system. They got stuck a lot, and teachers "annoyingly" pelted students with questions, not answers. Soon students started thinking out loud... Talking, sharing and collaborating with their partners and other teams...Teachers gave power to the students and partnered with them... Then we started recording. iMovie edits on the fly, so we were able to share students' creative, problem-solving thoughts with the entire class immediately after the lesson. A question in one group became a discussion point for the class, and the everyone took turns either building on the wonderment or providing solutions and ideas.
Get your head in the game!
A different class was studying Air and Aerodynamics where they were challenged to land a flying machine while keeping a lego-minifigure safe... Each work-period, though, they were starting from scratch. Their minds slowly (too slowly) began to ease into the lesson, so we filmed them thinking/questioning/working and hooked them by reminding them of the great work they had done in the previous lesson. We've repeated this a few times and have always been blown away by how a 2-5 minute video can instantly reengage students in their learning.
Documentaries.
In a 40 minute lesson, kids can develop a documentary and can be introduced to a new topic. They can develop questions to guide the inquiry and can help fill up the "Know" bit of a KWL... with ease. We pulled out a bunch of books, threw them on the floor and passed out iPads. After a 3 minute tutorial on iMovie (optional!), we asked kids to craft a documentary about the topic that included audio, video, titles, and visuals. Students took pictures from the book and published a 2-minute documentary. Ideally we'd throw those up on the internet for students to watch from home, but we wound up showing them to the class. It was amazing how activated their memories were... When we started to look at our prior knowledge, they were exploding with (base level) ideas. More importantly though, they were primed for the deeper learning that followed!
Celebrations.
For our most recent unit on the Inuit Games we showcased our learning to the entire school by hosting every grade. The grade 2 student-leaders taught all of the kids how to play their games, and the students responded by doing their best, being respectful and playing hard (it was a pretty amazing morning!). As students were leading and learning we recorded the entire process. On the fly, we edited a 10-minute video that included each grade 2 student. We also made a trailer on iMovie. In the afternoon the grade 2s all got together and had their own celebration of learning where they could watch themselves directing older kids, sharing their knowledge, and being successful.
Tuesday, 28 May 2013
Simple Machines & Digital Rube Goldberg Machines
How do we sync edtech and teaching to enhance learning without just "playing" with toys? How do we match the tool to the learning, not the learning to the tool?
Accessing prior knowledge often just needs a nudge to get the ball rolling, and we used "Do Ink" animations to begin the conversation about Simple Machines.
We told the fourth graders that they were learning a new app to add to their backpack of tools for "sharing what they know". After a 2 minute intro to Do Ink on the SMART Board kids grabbed a topic from a hat and set off to work (topics are listed below).
It was hilarious to see what the tech-wizards produced and how quickly they mastered the frame-by-frame animation. When their videos were done students threw their work on the master iPad using "Instashare", pulled another topic and went to work creating more simple machine animations... Students, though, just thought they were learning to animate.
On the master iPad we used iMovie to mix the animations together and publish a single, cohesive (?) movie. Students saw their animations on the big screen by the end of the 40 minute class.
The next steps will be to discuss how their animations are simple machines and to brainstorm background knowledge on the simple machines that are all around us. What are they? How do we use them? Why do we use them? How do they help our daily lives?
Students will be challenged to create a physical and digital (Do Ink Animation) Rube Goldberg Machine, inclusive of as many simple machines as possible... I can't wait to share those when we get there!
Accessing prior knowledge often just needs a nudge to get the ball rolling, and we used "Do Ink" animations to begin the conversation about Simple Machines.
We told the fourth graders that they were learning a new app to add to their backpack of tools for "sharing what they know". After a 2 minute intro to Do Ink on the SMART Board kids grabbed a topic from a hat and set off to work (topics are listed below).
It was hilarious to see what the tech-wizards produced and how quickly they mastered the frame-by-frame animation. When their videos were done students threw their work on the master iPad using "Instashare", pulled another topic and went to work creating more simple machine animations... Students, though, just thought they were learning to animate.
On the master iPad we used iMovie to mix the animations together and publish a single, cohesive (?) movie. Students saw their animations on the big screen by the end of the 40 minute class.
The next steps will be to discuss how their animations are simple machines and to brainstorm background knowledge on the simple machines that are all around us. What are they? How do we use them? Why do we use them? How do they help our daily lives?
Students will be challenged to create a physical and digital (Do Ink Animation) Rube Goldberg Machine, inclusive of as many simple machines as possible... I can't wait to share those when we get there!
Tuesday, 21 May 2013
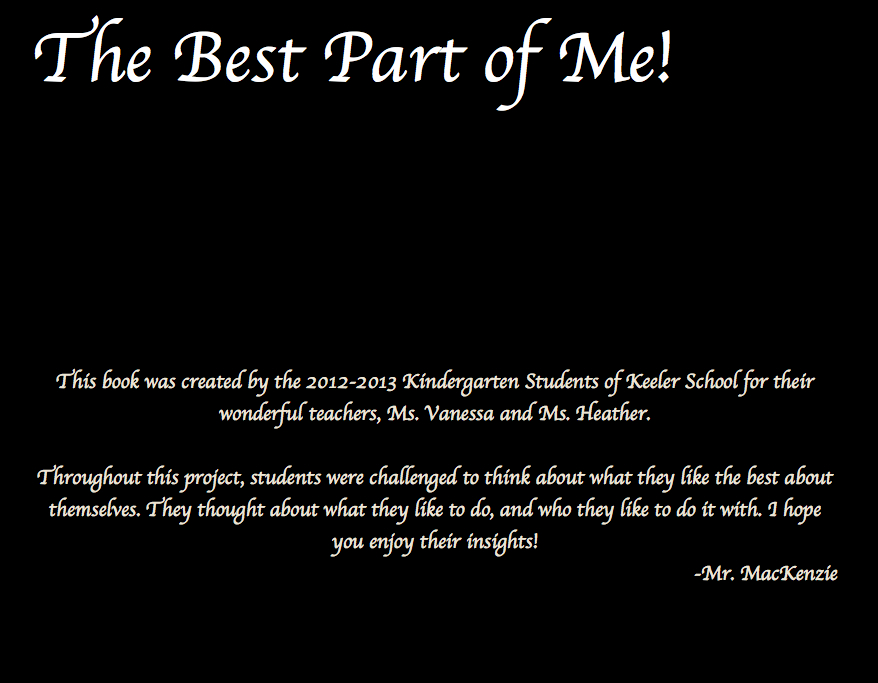
The Best Part of Me!
The Kindergartens and I built a book in the Learning Commons. For the teachers, it really tested our ability to question and to inspire those rich, wonderful utterances from students.
We asked ourselves:
We went for exploring emotions, ideas, feelings, experiences, and for giving meaning to students' daily lives/routines. We read the book "The Best Part of Me" by Wendy Ewald, then turned around and made our own!
It took a while, but we were able to abide by the Reggio Emilia belief that "The child is worthy of being listend to." We honoured how important it is to "listen, observe, interact, and learn from the child(ren)". And really, it was the kids that wrote the book and the teachers who worked on their questioning skills...
Below are some of the pictures from the book. It is absolutely beautiful (for us) because of how the students' voices reflect their personalities and their uniqueness, and how succinctly they touched on the important things in life.
Of course I can't put student names on here, and I've had to blur out faces... But I am working on getting the paperwork done so it can be celebrated! We have published a hard-copy version of it through iPhoto for our Learning Commons... If you're interested, swing by and we'd be happy to show it off!
Here is a link to a small bit of the book.
We asked ourselves:
- How do we generate conversation? How can we forgo "leading" questions?
- How can students express emotions and put meaning to experiences, without an extensive vocabulary? How do we get students to speak in metaphor?
- What questioning encourages students to open up and express their thoughts?
- What is appropriate wait time?
We went for exploring emotions, ideas, feelings, experiences, and for giving meaning to students' daily lives/routines. We read the book "The Best Part of Me" by Wendy Ewald, then turned around and made our own!
It took a while, but we were able to abide by the Reggio Emilia belief that "The child is worthy of being listend to." We honoured how important it is to "listen, observe, interact, and learn from the child(ren)". And really, it was the kids that wrote the book and the teachers who worked on their questioning skills...
Below are some of the pictures from the book. It is absolutely beautiful (for us) because of how the students' voices reflect their personalities and their uniqueness, and how succinctly they touched on the important things in life.
Of course I can't put student names on here, and I've had to blur out faces... But I am working on getting the paperwork done so it can be celebrated! We have published a hard-copy version of it through iPhoto for our Learning Commons... If you're interested, swing by and we'd be happy to show it off!
Here is a link to a small bit of the book.
Wednesday, 15 May 2013
Lego Logic: Building a City
I'm excited about this project: The students are creating a Lego City! They've been givin a lot each and with increasingly difficult challenges are tasked with developing their land, building houses, growing the community, and solving social problems around meeting the needs of the constituents.
Of course it costs money to build, so lego bricks aren't free. This means that after they've planned their layout, they've got to calculate the perimeter and then the total price to build a wall. Then they've got to build up... The greatest surprise in this is that as a school we ran out of red lego bricks (the cheapest at $2 per nub), meaning that students had to change their colours, costing them more money. More than a few students had to go back to the second challenge and re-build their floor plan.
We're really just getting started, so there will be much more to come!
The planning document is below (feel free to edit, please, we're looking for feedback!), and the challenge cards are here, too. Any thoughts will be hugely helpful and much appreciated!
Planning Document: https://docs.google.com/document/d/1NEDGzkbd062fZW0eGWYPp6QEBny0fXND19TE8gPLYmA/edit
Of course it costs money to build, so lego bricks aren't free. This means that after they've planned their layout, they've got to calculate the perimeter and then the total price to build a wall. Then they've got to build up... The greatest surprise in this is that as a school we ran out of red lego bricks (the cheapest at $2 per nub), meaning that students had to change their colours, costing them more money. More than a few students had to go back to the second challenge and re-build their floor plan.
We're really just getting started, so there will be much more to come!
The planning document is below (feel free to edit, please, we're looking for feedback!), and the challenge cards are here, too. Any thoughts will be hugely helpful and much appreciated!
Planning Document: https://docs.google.com/document/d/1NEDGzkbd062fZW0eGWYPp6QEBny0fXND19TE8gPLYmA/edit
Thursday, 21 March 2013
Our Physical Space
The physical space is often a hurdle when setting up the Learning Commons. There are no hard and-fast rules around creating the space... Really it is about the students, the teachers, and the larger community. Here are some informal guidelines we used to set up a dynamic, learner-centered space.
The tables below come from Moen Designs in Edmonton Alberta. We received a wonderful grant from Education Matters to purchase any table we would like, and we went with the "Burp" (to the left). Our students, though, affectionately refer to them as the "Ladybug" tables because their "wings" open to expose the underbelly (Another working space!).
The benches (below) were also purchased from Moen Designs. We chose them because they come in a couple different sizes, and they are sturdy enough to stand on... And the perfect height for students to work (draw, read, write, build) on.
1. Allow Student Voice
Students are the primary consumers of the space and their input is paramount... We began the year with a grade 6 mapping project. After mapping the space, students came up with new ideas and proposals to make it more appealing and functional. We listened - and now we can't keep them out whether it's class time, recess, or lunch!2. Use The Walls
We pushed everything off to the walls... Opening up a flexible, middle space is extremely important. Students and teachers are able to move shelves, tables, and SMART Boards around as needed. For example, tables can be clumped for large-group work, or separated for small group work, or separated so individuals can work in peace!3. Use Castors
All of our tables and bookshelves are standing on castors... Having wheels means that the space can completely change for presentations or events. We have Karaoke Club, special presenters, staff meetings, large classes, small classes, and individual students all working at the same or different times throughout the Commons.4. Consider Learning Styles
Just because the buzz of education right now is group work, collaboration, and cooperation, doesn't mean that intrapersonal students that like to learn independently in a quiet and peaceful place have left the building! We've set up quiet areas with noise-blocking headphones near the windows and we've got a quiet table for guided reading, where visual distractions are a minimum.5. Think About Tables & Surfaces
The tables below come from Moen Designs in Edmonton Alberta. We received a wonderful grant from Education Matters to purchase any table we would like, and we went with the "Burp" (to the left). Our students, though, affectionately refer to them as the "Ladybug" tables because their "wings" open to expose the underbelly (Another working space!).
The benches (below) were also purchased from Moen Designs. We chose them because they come in a couple different sizes, and they are sturdy enough to stand on... And the perfect height for students to work (draw, read, write, build) on.6. Open the Windows!
I don't know why this is such a big one... Kids are NOT distracted by the great outdoors, and natural light is extremely helpful. I'm not worried about students being distracted when peering outside, and the natural light is infinitely better than the dim, fluorescent lights flickering at 120 Hertz in our students' eyes.7. Be Dynamic
Everything needs to change over time. Our SMART Board moves, the tables rolls, the benches are carried, and the chairs all move throughout the course of the day. The space transforms to meet the needs of our students...Our community wouldn't do it any other way!Monday, 4 March 2013
Exemplars and Comics
Using Exemplars with Photocomic
Using exemplars to set clear expectations is vital when designing a project... This is our infusion of technology in the process of examining student work, setting criteria and building a rubric for writing a feasibility report for settling a planet.
The Bigger Picture
We're well on our way to colonizing the solar system! Kids have completed their research, and they're now ready to compile their information into an official "Colonization Report". To do this, they'll need to examine both excellent and lackluster reports to help wrap their heads around the expectations .. We wanted to find a way for students to document what makes a good report and found a natural connection with an App called Photocomic.
After this, students will write reports that they will submit to the Canadian Extra-Terrestrial Space Agency for review. They will then write a storyboard and screenplay to help them develop a recruitment video to help them lure students, parents, and community members to their planet.
The Task
Students will be given specific topics (Creative Language, Organization, Visuals, and Content) to carefully consider as they go through the exemplars. Each student will record successes and shortcomings about their topic using an iPad app called Photocomic.
The App
We've used the app Photocomic for a number of purposes and the more we use it, the more we love it! It is simple enough that clean, clear work can be created, published, and shared within a 30 minute period. It's been used to act out key moments within a book-study, to role-play social situations, and to enhance concepts such as friendship.
It allows you to take photographs and arrange them in a number of ways to look like the pages of a comic book. Students can add all of the elements of a comic, including speech bubbles, thought bubbles, action words, etc.
The Process
Students are challenged to become masters of the "Photocomic" app in 5 minutes. The only rules: You must touch every button to see what it does and you must create a comic!
Students are given their task cards and join their groups. They are to take photographs of the exemplars and to annotate with speech bubbles, thought bubbles, and action words to show what they like/dislike about the exemplar. It is expected that each student will contribute 1 speech bubble/sound effect.
Students then go to the next table, take a close look at that exemplar, and repeat!
At the end, the students will put their comics on to the teacher's computer, who will throw all of the pictures on the SMART Board so that everyone can see what makes a great report. Afterwards, the teacher guides the students as they come up with their own rubric that clearly describes the expectations.
Differentiation
All students can participate in this because there is so much to evaluate! Some students can use higher-order thinking skills and analyze the content. Others can really think about the grammar/word-choice, and others still can examine the visuals. We'll choose the roles and make sure they cater to the right students.
Using the Photocomic App students can either be detailed about about their evaluation (they can write speech bubbles, clearly outlining why they may/may note emulate something), or they can can use sound effects such as "Ouch!" to show that something is undesirable.
5 Considerations About Exemplars
Narrow the Focus: We had 4 to 5 people in each group, and each student had a role where they were looking for a certain topic. It was way too much, and the activity nearly bombed because of it! Were we to do it again, I'd suggest having each group focus on one topic, rather than 4. And I'd suggest the each group share one same topic of analysis.
Time: At the beginning, we gave students iPads and told them to get started after explaining the task... If only it were that simple! They jumped right in for sure, but they took inconsequential pictures and didn't provide thoughtful comments.
After the first round, we had them close their iPads and focus on the work itself. After we heard sufficient discussion and we had a chance to discuss with each group, then we had them open the iPads.
Groupings: I'm always tempted to put a higher student with a lower student to settle behavior issues and enhance learning. I wonder, though, what this is doing for both students' learning! One isn't challenged by the other, and the other is so far below, are they getting anything out of the lesson? Would it be better to put all of the lower students together and to use different exemplars with catered expectations? How would that look?
Exemplars: We used great exemplars and 2 non-exemplars that were created at a much lower grade level. It's tricky though... We have students that really struggle with reading and writing, and I'm hoping that they didn't feel awful about themselves when they saw the non-exemplar was at their ability level. When the integration model fails, I guess...We'll have to find new ways to approach this next time.
Return: The idea of annotating with the iPads worked really well, but some extra work needs to be done with the kids! It's just October, so I'm hoping that we'll get this figured when we try it another few times... We'll see!
Using exemplars to set clear expectations is vital when designing a project... This is our infusion of technology in the process of examining student work, setting criteria and building a rubric for writing a feasibility report for settling a planet.
The Bigger Picture
We're well on our way to colonizing the solar system! Kids have completed their research, and they're now ready to compile their information into an official "Colonization Report". To do this, they'll need to examine both excellent and lackluster reports to help wrap their heads around the expectations .. We wanted to find a way for students to document what makes a good report and found a natural connection with an App called Photocomic.
After this, students will write reports that they will submit to the Canadian Extra-Terrestrial Space Agency for review. They will then write a storyboard and screenplay to help them develop a recruitment video to help them lure students, parents, and community members to their planet.
The Task
Students will be given specific topics (Creative Language, Organization, Visuals, and Content) to carefully consider as they go through the exemplars. Each student will record successes and shortcomings about their topic using an iPad app called Photocomic.
The App
![]() |
| Photocomic |
It allows you to take photographs and arrange them in a number of ways to look like the pages of a comic book. Students can add all of the elements of a comic, including speech bubbles, thought bubbles, action words, etc.
The Process
Students are challenged to become masters of the "Photocomic" app in 5 minutes. The only rules: You must touch every button to see what it does and you must create a comic!
Students are given their task cards and join their groups. They are to take photographs of the exemplars and to annotate with speech bubbles, thought bubbles, and action words to show what they like/dislike about the exemplar. It is expected that each student will contribute 1 speech bubble/sound effect.
Students then go to the next table, take a close look at that exemplar, and repeat!
At the end, the students will put their comics on to the teacher's computer, who will throw all of the pictures on the SMART Board so that everyone can see what makes a great report. Afterwards, the teacher guides the students as they come up with their own rubric that clearly describes the expectations.
Differentiation
| We really need to narrow the focus... |
Using the Photocomic App students can either be detailed about about their evaluation (they can write speech bubbles, clearly outlining why they may/may note emulate something), or they can can use sound effects such as "Ouch!" to show that something is undesirable.
5 Considerations About Exemplars
Narrow the Focus: We had 4 to 5 people in each group, and each student had a role where they were looking for a certain topic. It was way too much, and the activity nearly bombed because of it! Were we to do it again, I'd suggest having each group focus on one topic, rather than 4. And I'd suggest the each group share one same topic of analysis.
| It's great how they could use the '!!!!' symbol to point out the juicy words! |
After the first round, we had them close their iPads and focus on the work itself. After we heard sufficient discussion and we had a chance to discuss with each group, then we had them open the iPads.
Groupings: I'm always tempted to put a higher student with a lower student to settle behavior issues and enhance learning. I wonder, though, what this is doing for both students' learning! One isn't challenged by the other, and the other is so far below, are they getting anything out of the lesson? Would it be better to put all of the lower students together and to use different exemplars with catered expectations? How would that look?
| I guess that "Zonk!" means it's good... |
Return: The idea of annotating with the iPads worked really well, but some extra work needs to be done with the kids! It's just October, so I'm hoping that we'll get this figured when we try it another few times... We'll see!
Subscribe to:
Posts (Atom)